

Configure SCIM Provisioning for a Custom Developer Portal with Okta
Configure SCIM provisioning with Okta for a custom Developer Portal based on the API7 Developer Portal Boilerplate.
This guide explains how to enable SCIM (System for Cross-domain Identity Management) provisioning for a custom Developer Portal built from the API7 Developer Portal Boilerplate, so that developer accounts are synchronized automatically from Okta.
This page applies only if you build your own frontend from the Boilerplate. If you run the official api7-ee-developer-portal-fe image, configure SCIM from the Provider Portal instead — see Configure the Developer Portal.
SCIM is not part of the Boilerplate. It is a Better Auth plugin you add yourself, so the portal-side work is a code change plus a database migration; the Okta-side work is the same either way.
Prerequisites
- A custom Developer Portal deployed from the API7 Developer Portal Boilerplate.
- A working portal you can rebuild and redeploy — every step below requires a rebuild.
- An Okta account with administrative privileges.
- The portal reachable from Okta over HTTPS at a publicly resolvable address.
Step 1: Create a SCIM Application in Okta
Do this first: the Okta application exists independently of the portal code, and having it in place makes the credential you generate later immediately testable.
- Log in to the Okta Admin Console.
- Go to Applications -> Applications.
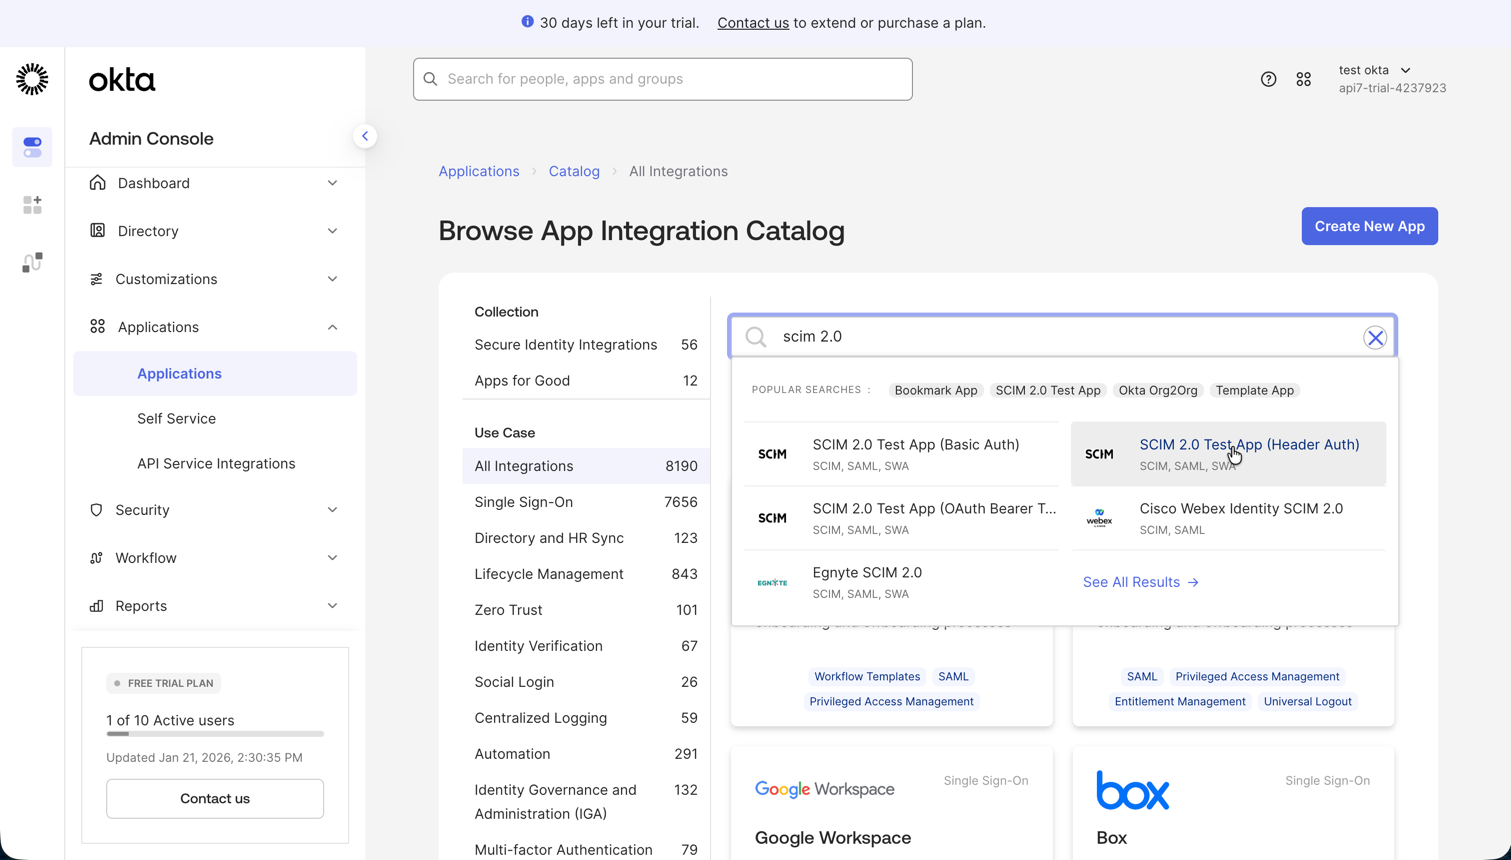
- Click Browse App Catalog.
- Search for
SCIM. - Select SCIM 2.0 Test App (Header Auth).
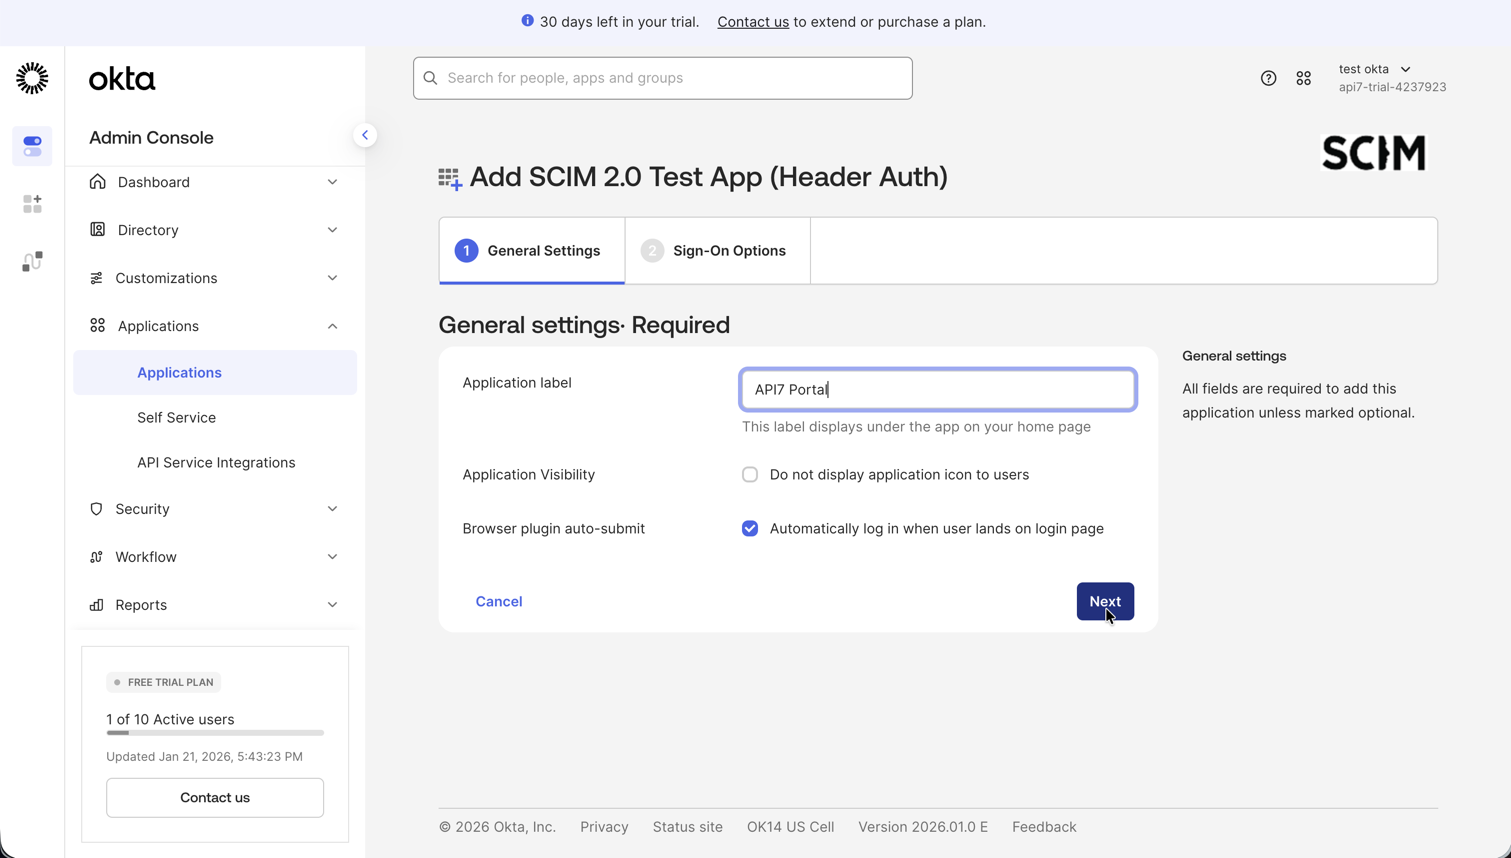
- Click Add Integration.
- In General Settings, name the application, such as
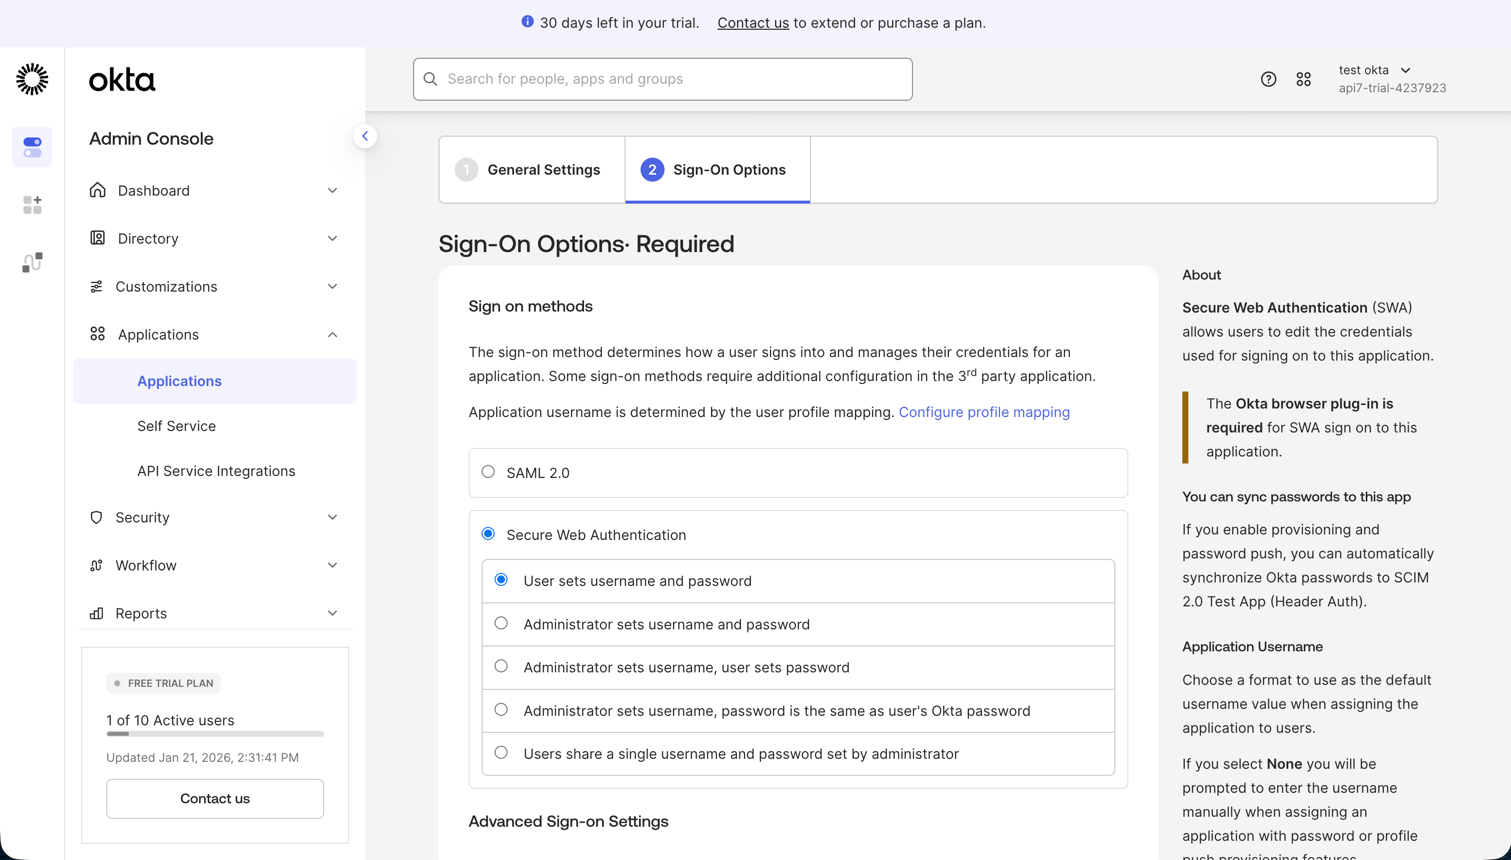
API7 Portal. - In Sign-On Options, select Secure Web Authentication (SWA).
- Click Done.
Step 2: Install the SCIM Plugin
Install the plugin into the site application:
# match the version to the better-auth already in the lockfile
pnpm --filter @api7ee/site list better-auth
pnpm --filter @api7ee/site add @better-auth/scim@<that version>
Pin the SCIM plugin to the exact better-auth version you already have. @better-auth/scim declares better-auth as a peer at ^<its own version> — 1.7.5 requires better-auth@^1.7.5, not "any 1.7.x". The Boilerplate's lockfile currently resolves better-auth to 1.7.1, so a bare add @better-auth/scim installs 1.7.5 and fails the peer check.
Its API also changed between releases: 1.4.x exposed generateSCIMToken and a providerId, while 1.7.x replaced both with declared connections and a managed-credential catalog. A mismatched pair gives you type errors at build time, or a plugin that registers but rejects every Okta request at runtime.
Check the version you have before following the code below:
pnpm --filter @api7ee/site list better-auth @better-auth/scimThe instructions here are written for @better-auth/scim 1.7.x, which is what pairs with the better-auth 1.7.x that the current Boilerplate depends on.
Step 3: Register the Plugin
SCIM is a server-side plugin. Add it to the existing plugin list in apps/site/src/lib/auth/server.ts, leaving the other plugins in place. The token it reads from the environment is generated in Generate the Token below — write the code first, then produce the value:
import { scim } from '@better-auth/scim';

export const auth = betterAuth({
  // ...
  plugins: [
    openAPI(),
    admin({ /* ... */ }),
    ...getTwoFactorConfig(),
    organization(/* ... */),
    ...getGenericOAuthPlugin(),
    scim({
      connections: [
        {
          id: 'okta',
          credentials: [
            {
              type: 'bearer',
              id: 'okta-primary',
              token: process.env.SCIM_TOKEN!,
              scopes: ['scim.users.read', 'scim.users.write'],
            },
          ],
        },
      ],
    }),
  ],
});
A connection is the boundary that owns every resource Okta provisions. Its id is permanent — changing it later orphans everything already provisioned under the old value.
The credentials array holds every bearer token the endpoint accepts for that connection, which is what makes rotation possible: add the new token alongside the old one, update Okta, then remove the old entry in a later deploy. Grant only the scopes you use; scim.groups.read and scim.groups.write also exist and are unnecessary if you provision users only.
There is no SCIM client plugin to register in apps/site/src/lib/auth/client.ts. SCIM is machine-to-machine and never touches the browser.
Do not commit the token. Read it from the environment, as above, and supply it the same way you supply AUTH_SECRET and the database URL.
Generate the Token
Any sufficiently long random string works — the plugin compares it to what you configured:
openssl rand -base64 32Set it as SCIM_TOKEN in the portal's environment and keep a copy; you will paste it into Okta in Step 6.
Step 4: Route Handler
No change is needed. The catch-all auth route at apps/site/src/routes/api/auth/$.ts already declares GET, POST, PUT, PATCH and DELETE, which covers every SCIM operation.
This is a difference from the older Next.js Boilerplate, where toNextJsHandler exported only GET and POST and had to be widened by hand. If you are following an older copy of this procedure against a current checkout, skip that step.
Step 5: Apply Database Migrations
The plugin adds its own tables — SCIM users, groups, connection bindings and identity tombstones:
cd apps/site
pnpm db:generate-schema
pnpm db:generate
pnpm db:migrate
db:generate-schema re-reads the plugin list from src/lib/auth/server.ts, so run it after Step 3, not before. Inspect the generated migration in apps/site/drizzle/ before applying it to a database that already holds developer accounts.
Rebuild and redeploy the portal before continuing.
Step 6: Configure the Okta API Integration
- In Okta, open the Provisioning tab of your SCIM application.
- Click Configure API Integration.
- Enable API integration.
- Set:
- SCIM 2.0 Base URL to
https://<YOUR_PORTAL_DOMAIN>/api/auth/scim/v2 - API Token to
Bearer <YOUR_SCIM_TOKEN>
- SCIM 2.0 Base URL to
- Click Test API Credentials.
- If the test succeeds, click Save.
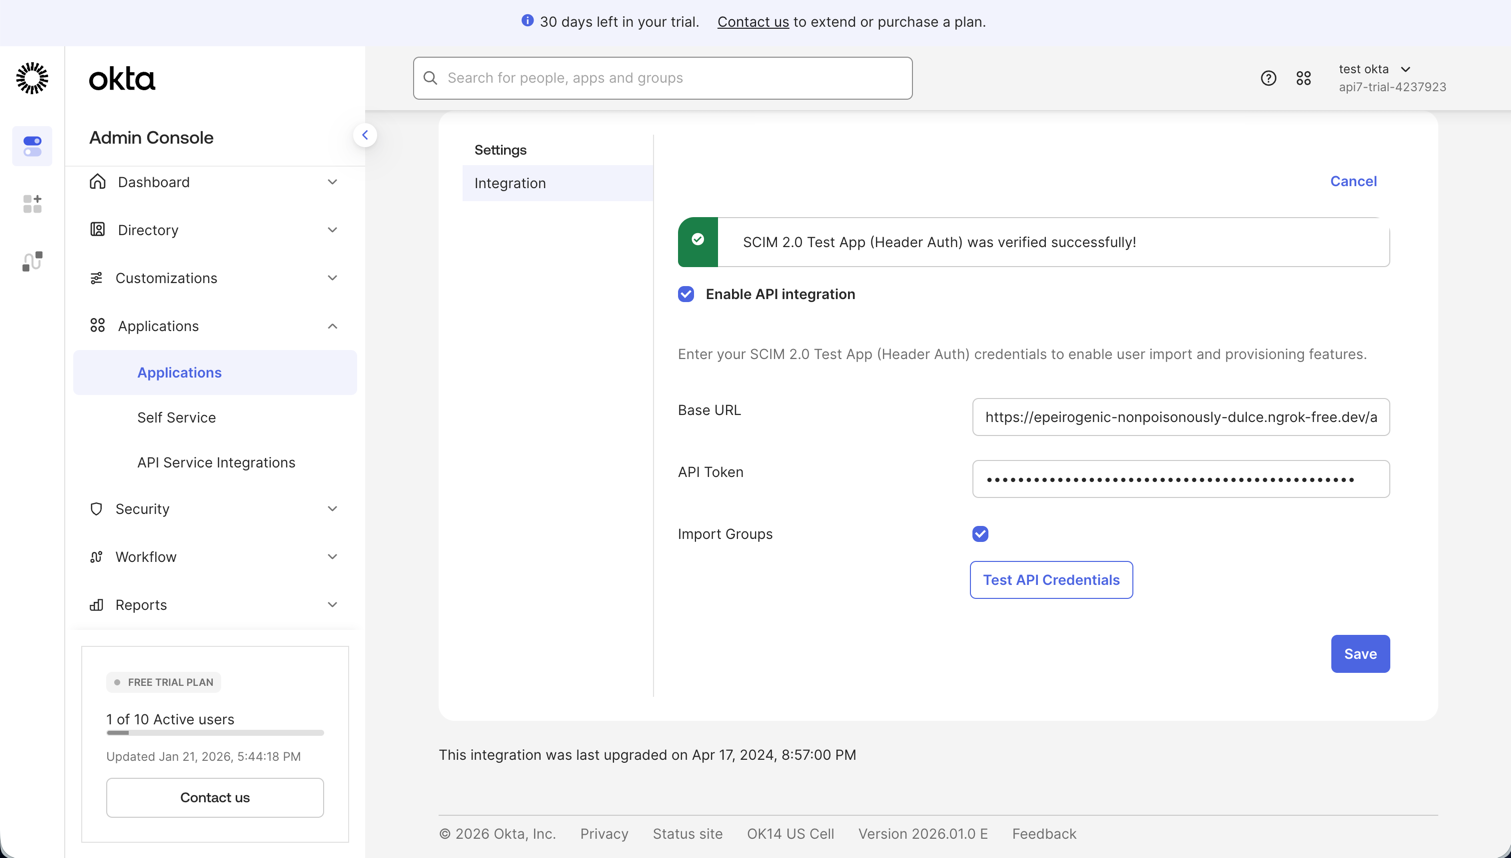
The base path follows the portal's auth base path, /api/auth. If you changed AUTH_BASE_PATH in apps/site/src/constants/api-prefix.ts, the SCIM URL moves with it.
Include the literal Bearer prefix in the API Token field. The SCIM 2.0 Test App (Header Auth) sends that field as the Authorization header as you typed it, and the plugin only accepts a bearer credential, so a bare token is rejected as unauthenticated.
If Test API Credentials fails, the cause is almost always one of: the portal was not rebuilt and redeployed after Step 5, the Bearer prefix is missing, the token in Okta does not match SCIM_TOKEN, or a proxy in front of the portal strips the Authorization header.
Step 7: Configure Provisioning and Assign Users
Configure provisioning
- In the Provisioning tab, select To App.
- Click Edit.
- Enable the features you need:
- Create Users
- Update User Attributes
- Deactivate Users
- Click Save.
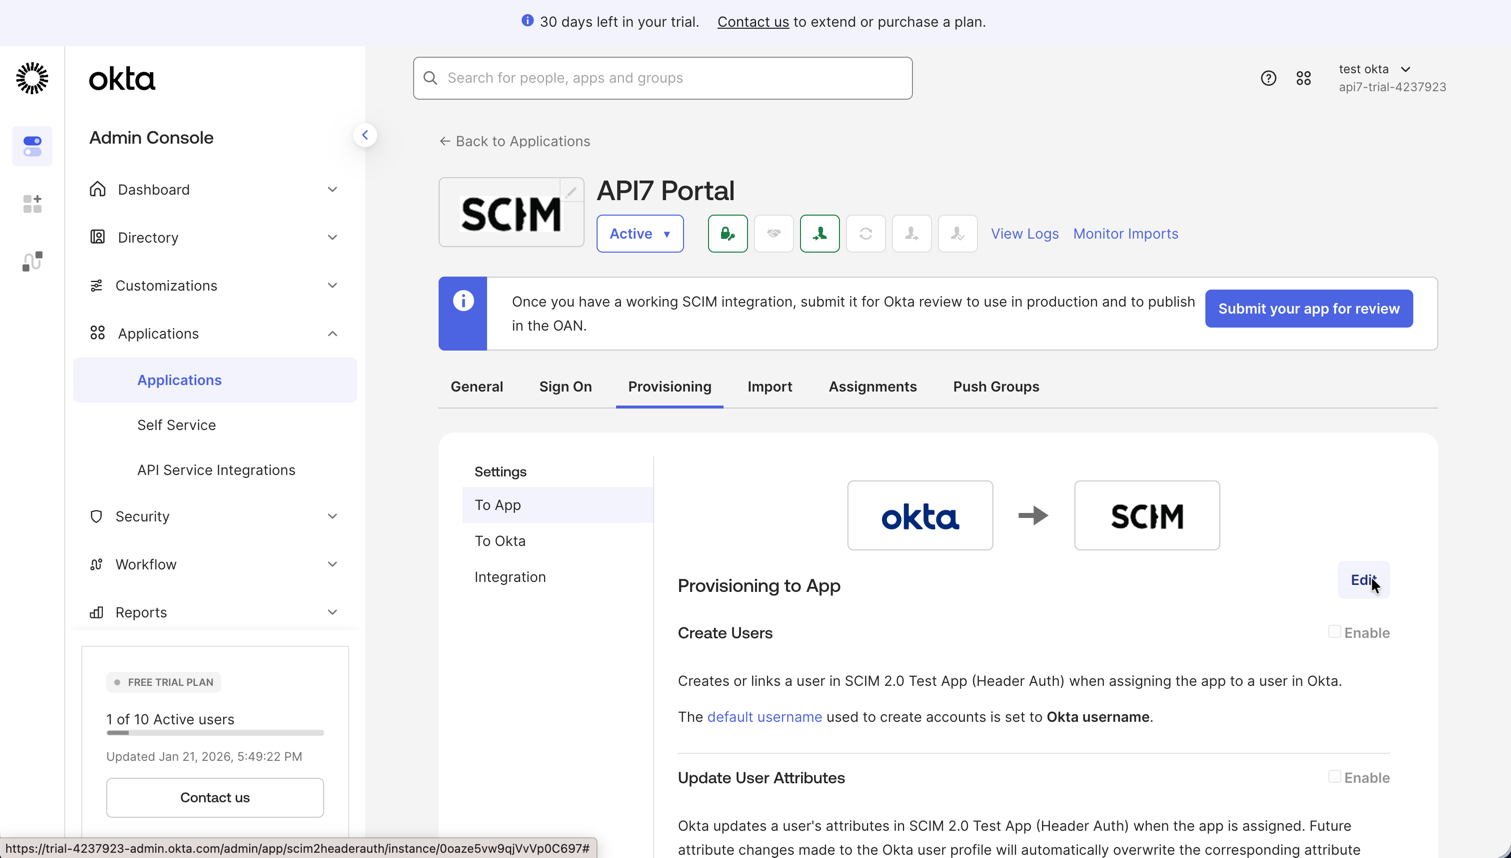
Enable only what you intend to happen. Deactivate Users in particular means an Okta unassignment immediately revokes portal access for that developer.
Assign users
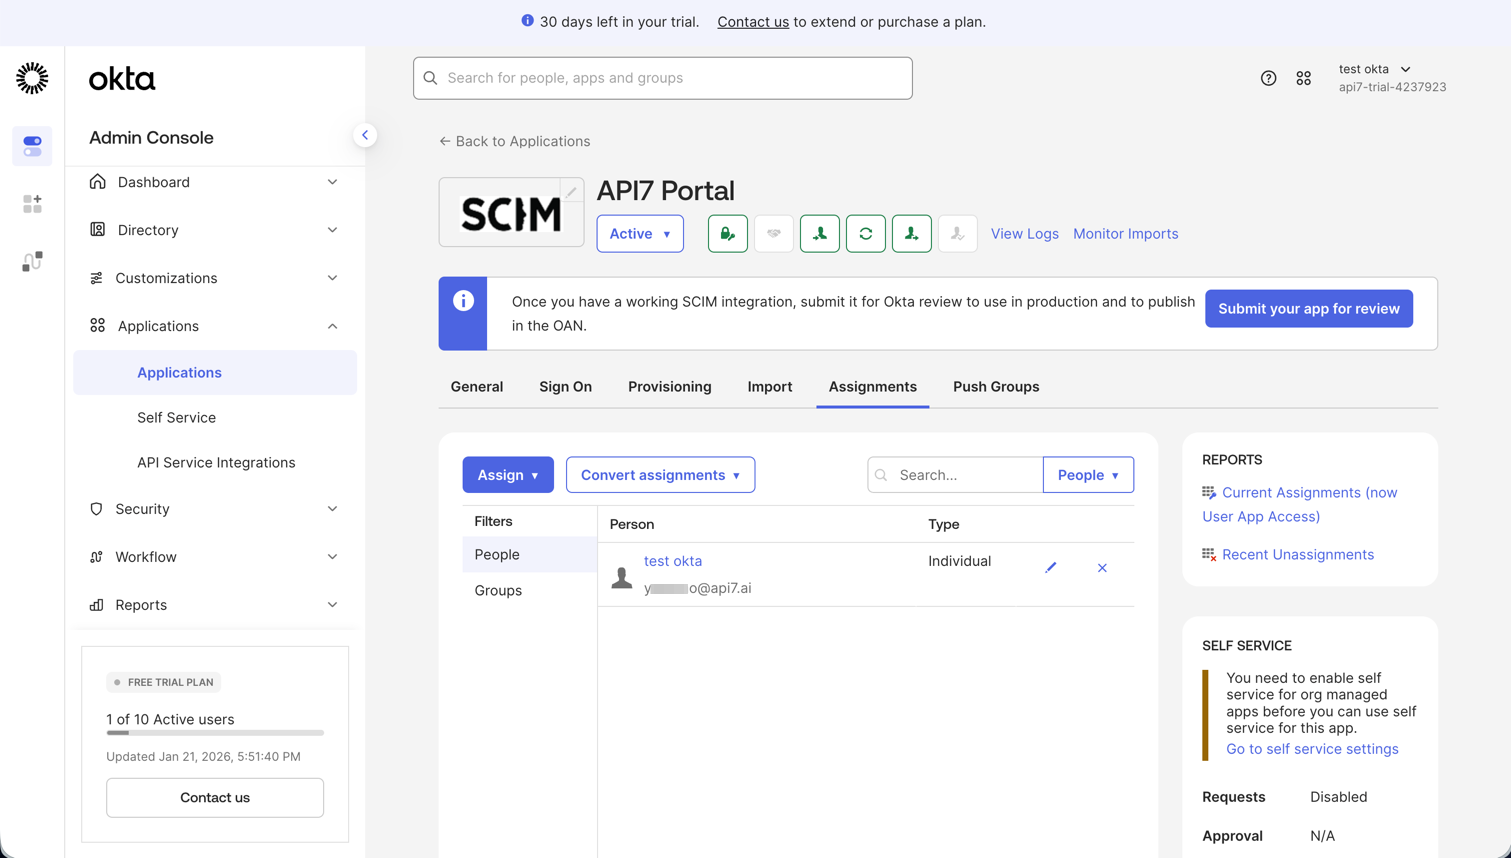
- Open the Assignments tab.
- Click Assign -> Assign to People or Assign to Groups.
- Select the users or groups to provision.
- Click Assign, then Done.
Step 8: Verify Provisioning
Confirm that the users you assigned arrived. Check the portal's admin user list, or query the backing database directly.
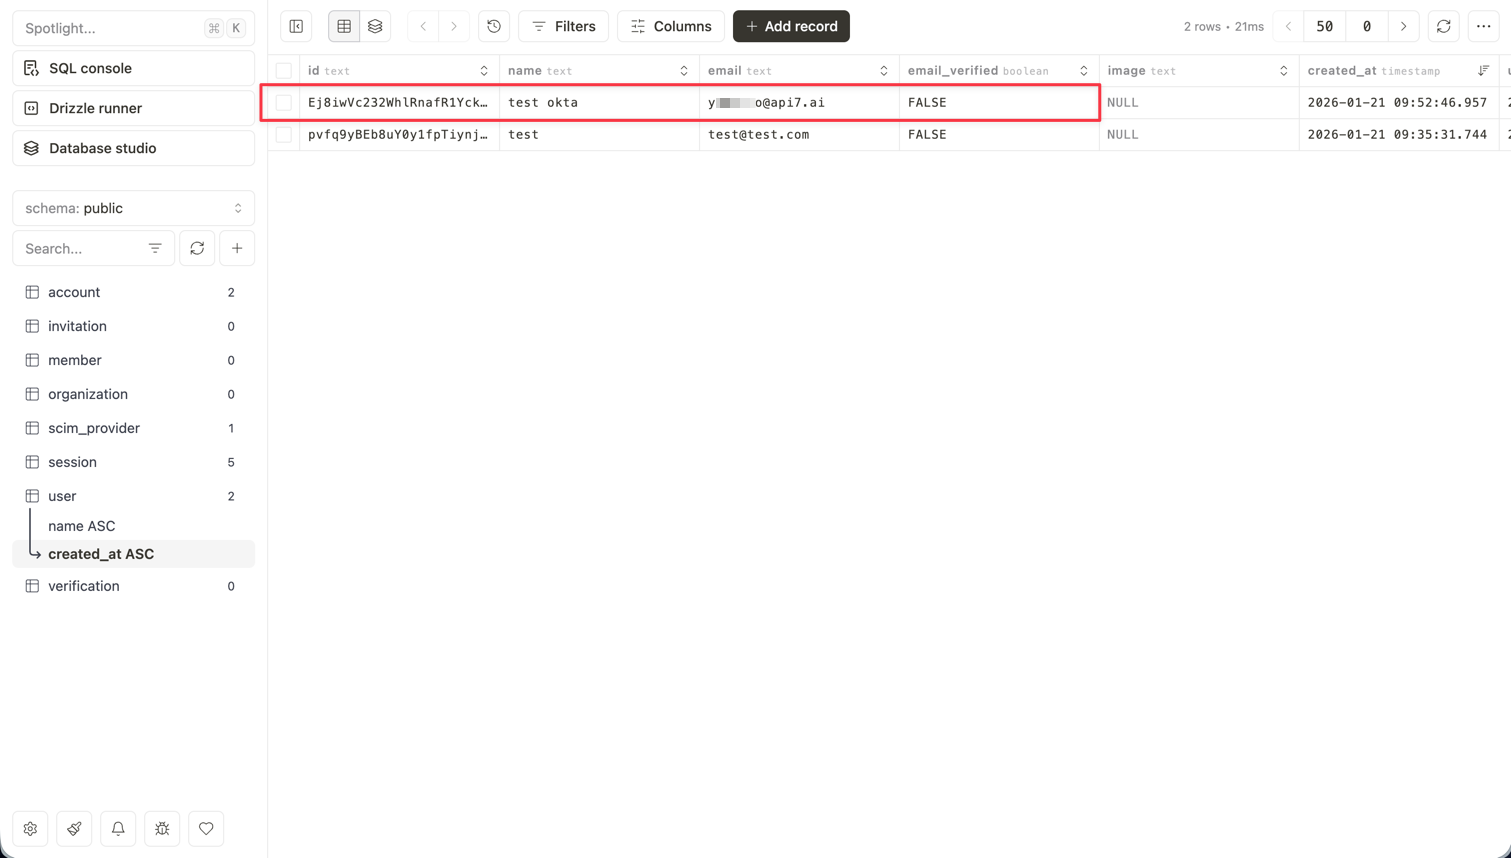
Provisioned is not the same as authorized. With the minimal configuration above, the plugin records the SCIM resources but grants no application access on its own. Deciding what a provisioned user may do — which organization they join and with which role — is the plugin's projection option, and organization membership in this portal is managed by the Better Auth organization plugin. Plan that mapping before you enable provisioning for real users, or verify it with a single test user first.
Next Steps
- Configure the Developer Portal — manage the built-in portal settings, including SCIM provisioning.
- Customize the Developer Portal — extend the Boilerplate with additional behavior.
- Configure SSO for the Developer Portal — add interactive login alongside SCIM provisioning.